This article will instruct setting up and configuring Splunk SOAR to run automatic threat hunts based on Recorded Future’s threat maps with Splunk SIEM. For more information, see Automated Threat Hunting with Recorded Future.
Dataflow
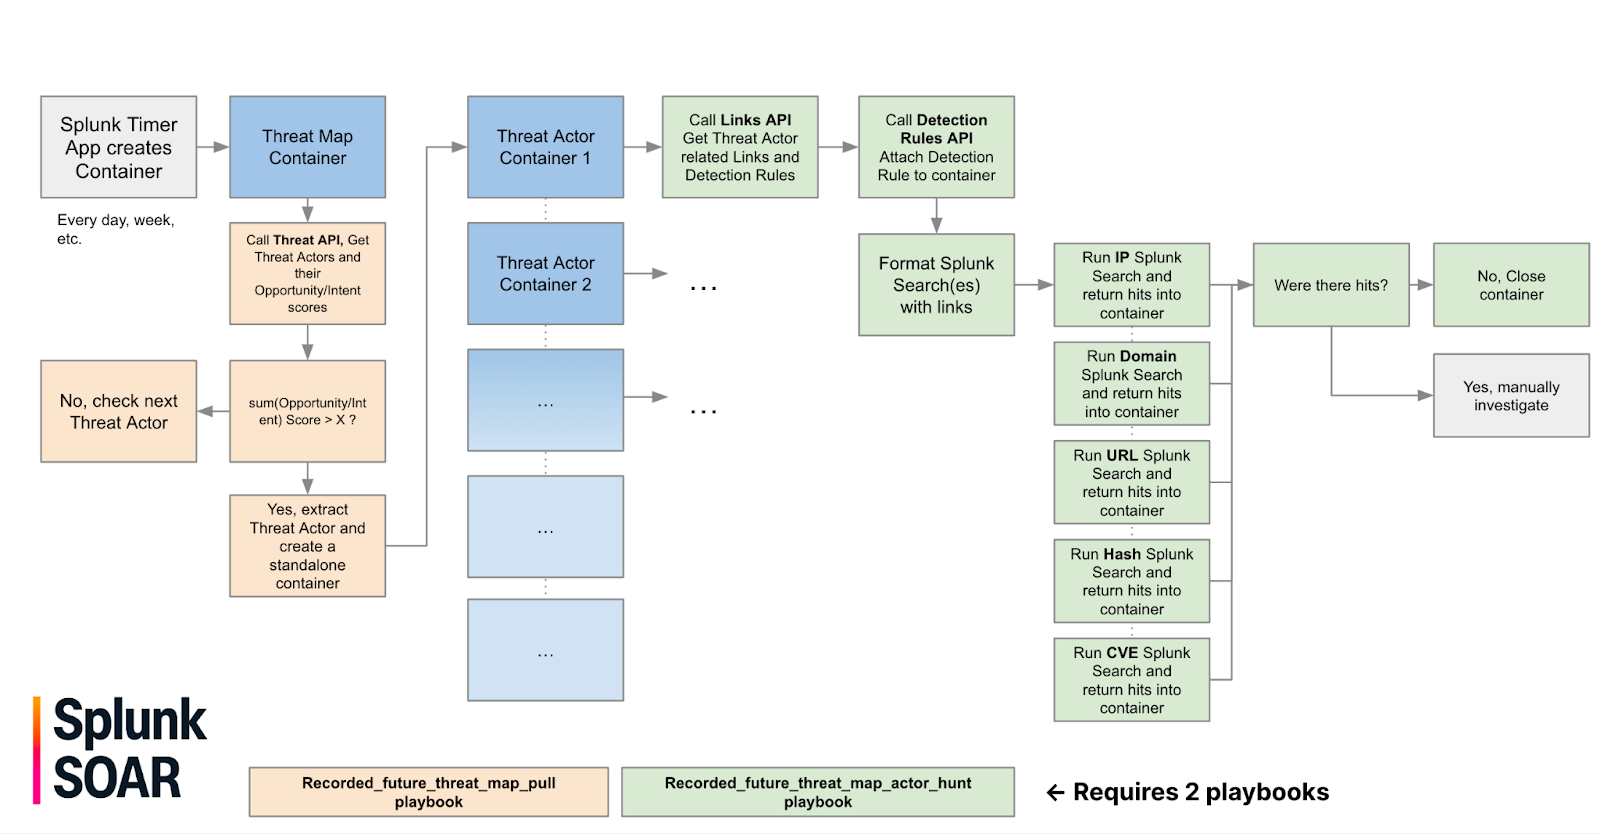
This workflow will begin by having the Splunk SOAR timer app create an empty Splunk SOAR container and apply a label. The applied label will automatically run recorded_future_threat_map_pull which will query the Recorded Future Threat Actor Threat Map and return a list of Threat Actors. Threat Actors with an intent or opportunity score greater than 90 will be extracted and used to create a new Splunk SOAR container.
Each new Splunk SOAR container will call recorded_future_threat_map_actor_hunt which will query Recorded Future for Links relating to the threat actor, format a Splunk search query with IP, Domain, URL, Hash, and Vulnerability IoCs, and run a Splunk search to look for any hits. Any Sigma, YARA, or Snort rules associated with the threat actor will also be downloaded and attached to the Splunk SOAR container.
Downloads
Playbooks are available on the Recorded Future support site.
Playbook Instructions
- Download the playbooks from the Recorded Future Support site: https://support.recordedfuture.com/hc/en-us/articles/12294483605523-Splunk-SOAR-Template-Playbooks-Library.
- Import the recorded_future_threat_map_pull playbook. Enable it to operate on threat map labels and make it Active:
- Import the recorded_future_threat_map_actor_hunt playbook. Enable it to operate on threat map labels and make it Active.
- Your playbooks will now run and automatically generate events.
Note: Threat Intelligence module license is required to make use of this template playbook to leverage Threat Map for performing Automated Threat Hunting.